This document provides examples of how to create choropleth maps of
Mexican states using the mxmaps package. The examples
demonstrate how to customize the maps, including changing the color
scale, adding state labels, handling missing values in the legend, and
arranging multiple maps in a grid.
Basic State Choropleth
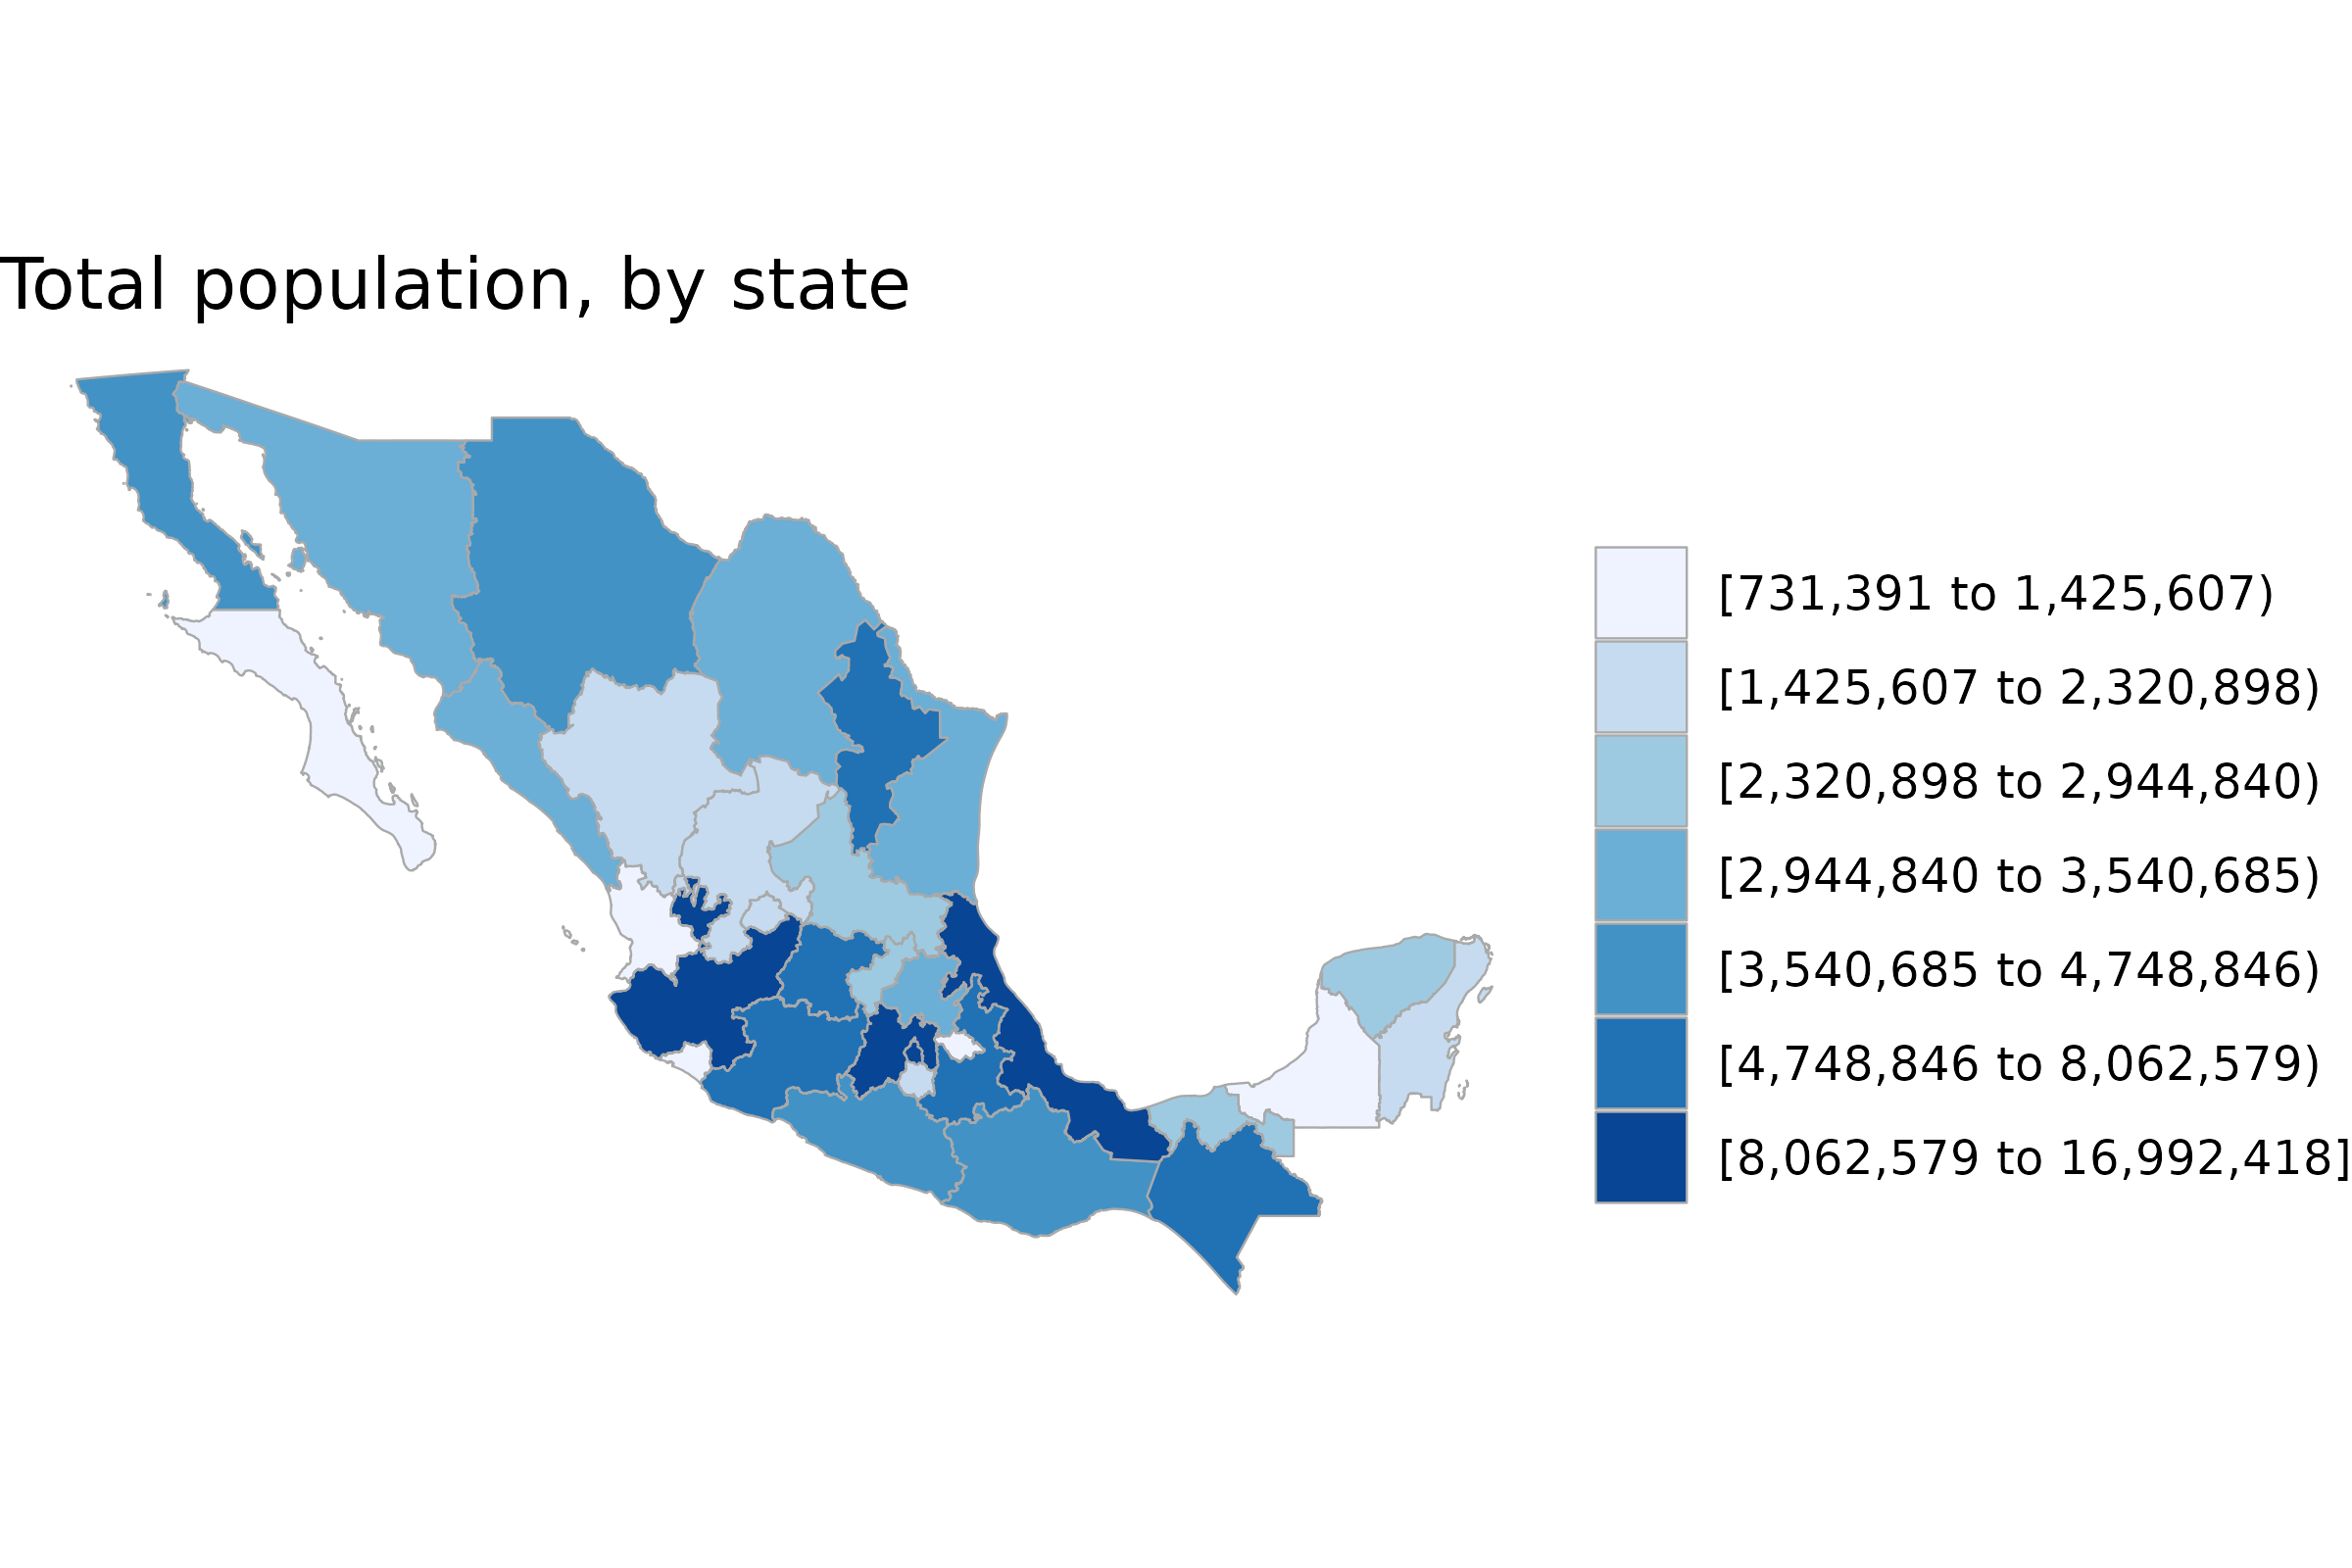
This example shows how to create a simple choropleth map of Mexican states, displaying the total population by state.
library(mxmaps)

data("df_mxstate_2020")
df_mxstate_2020$value <- df_mxstate_2020$pop
mxstate_choropleth(df_mxstate_2020,
  title = "Total population, by state"
)
Customizing the Color Scale
This example demonstrates how to change the color scale of the map.
The viridis color scale is used to represent the percentage
of the population that speaks an indigenous language.
library(mxmaps)
library(viridis)
library(scales)

df_mxstate_2020$value <- df_mxstate_2020$indigenous_language /
  df_mxstate_2020$pop
gg <- MXStateChoropleth$new(df_mxstate_2020)
gg$title <- "Percentage of the population that speaks\nan indigenous language"
gg$set_num_colors(1)
gg$ggplot_scale <- scale_fill_viridis("percent", labels = percent)
gg$render()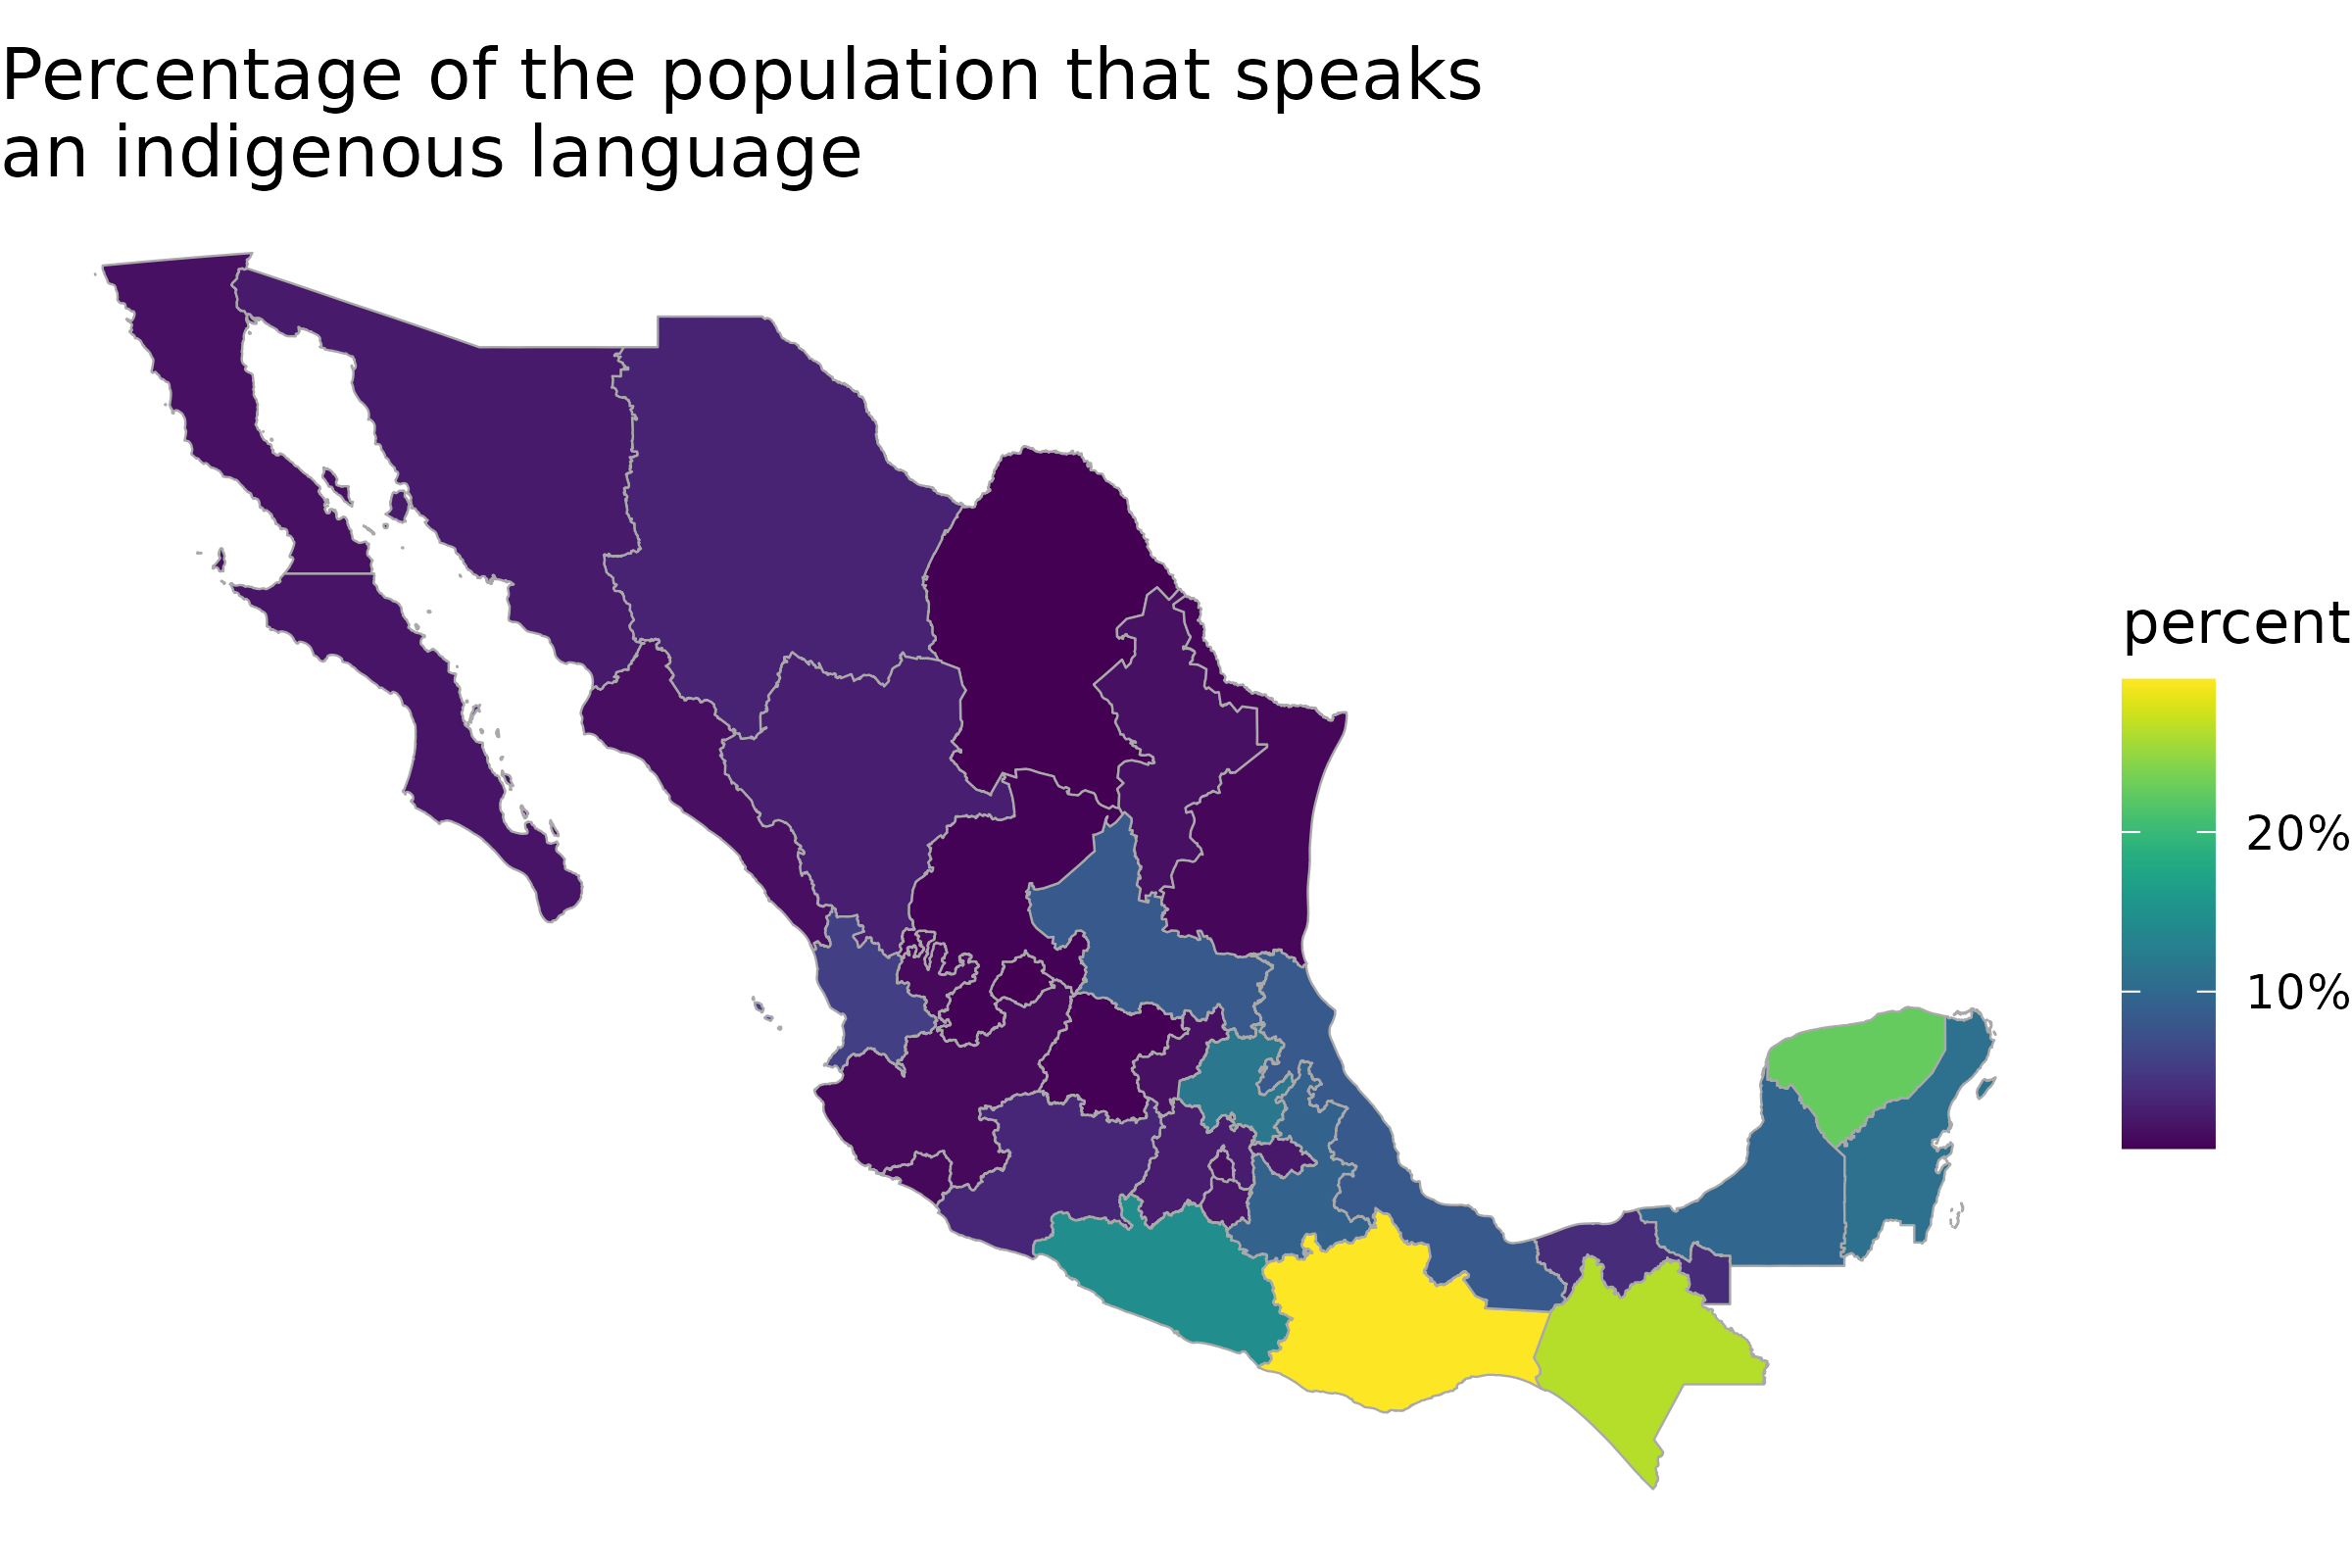
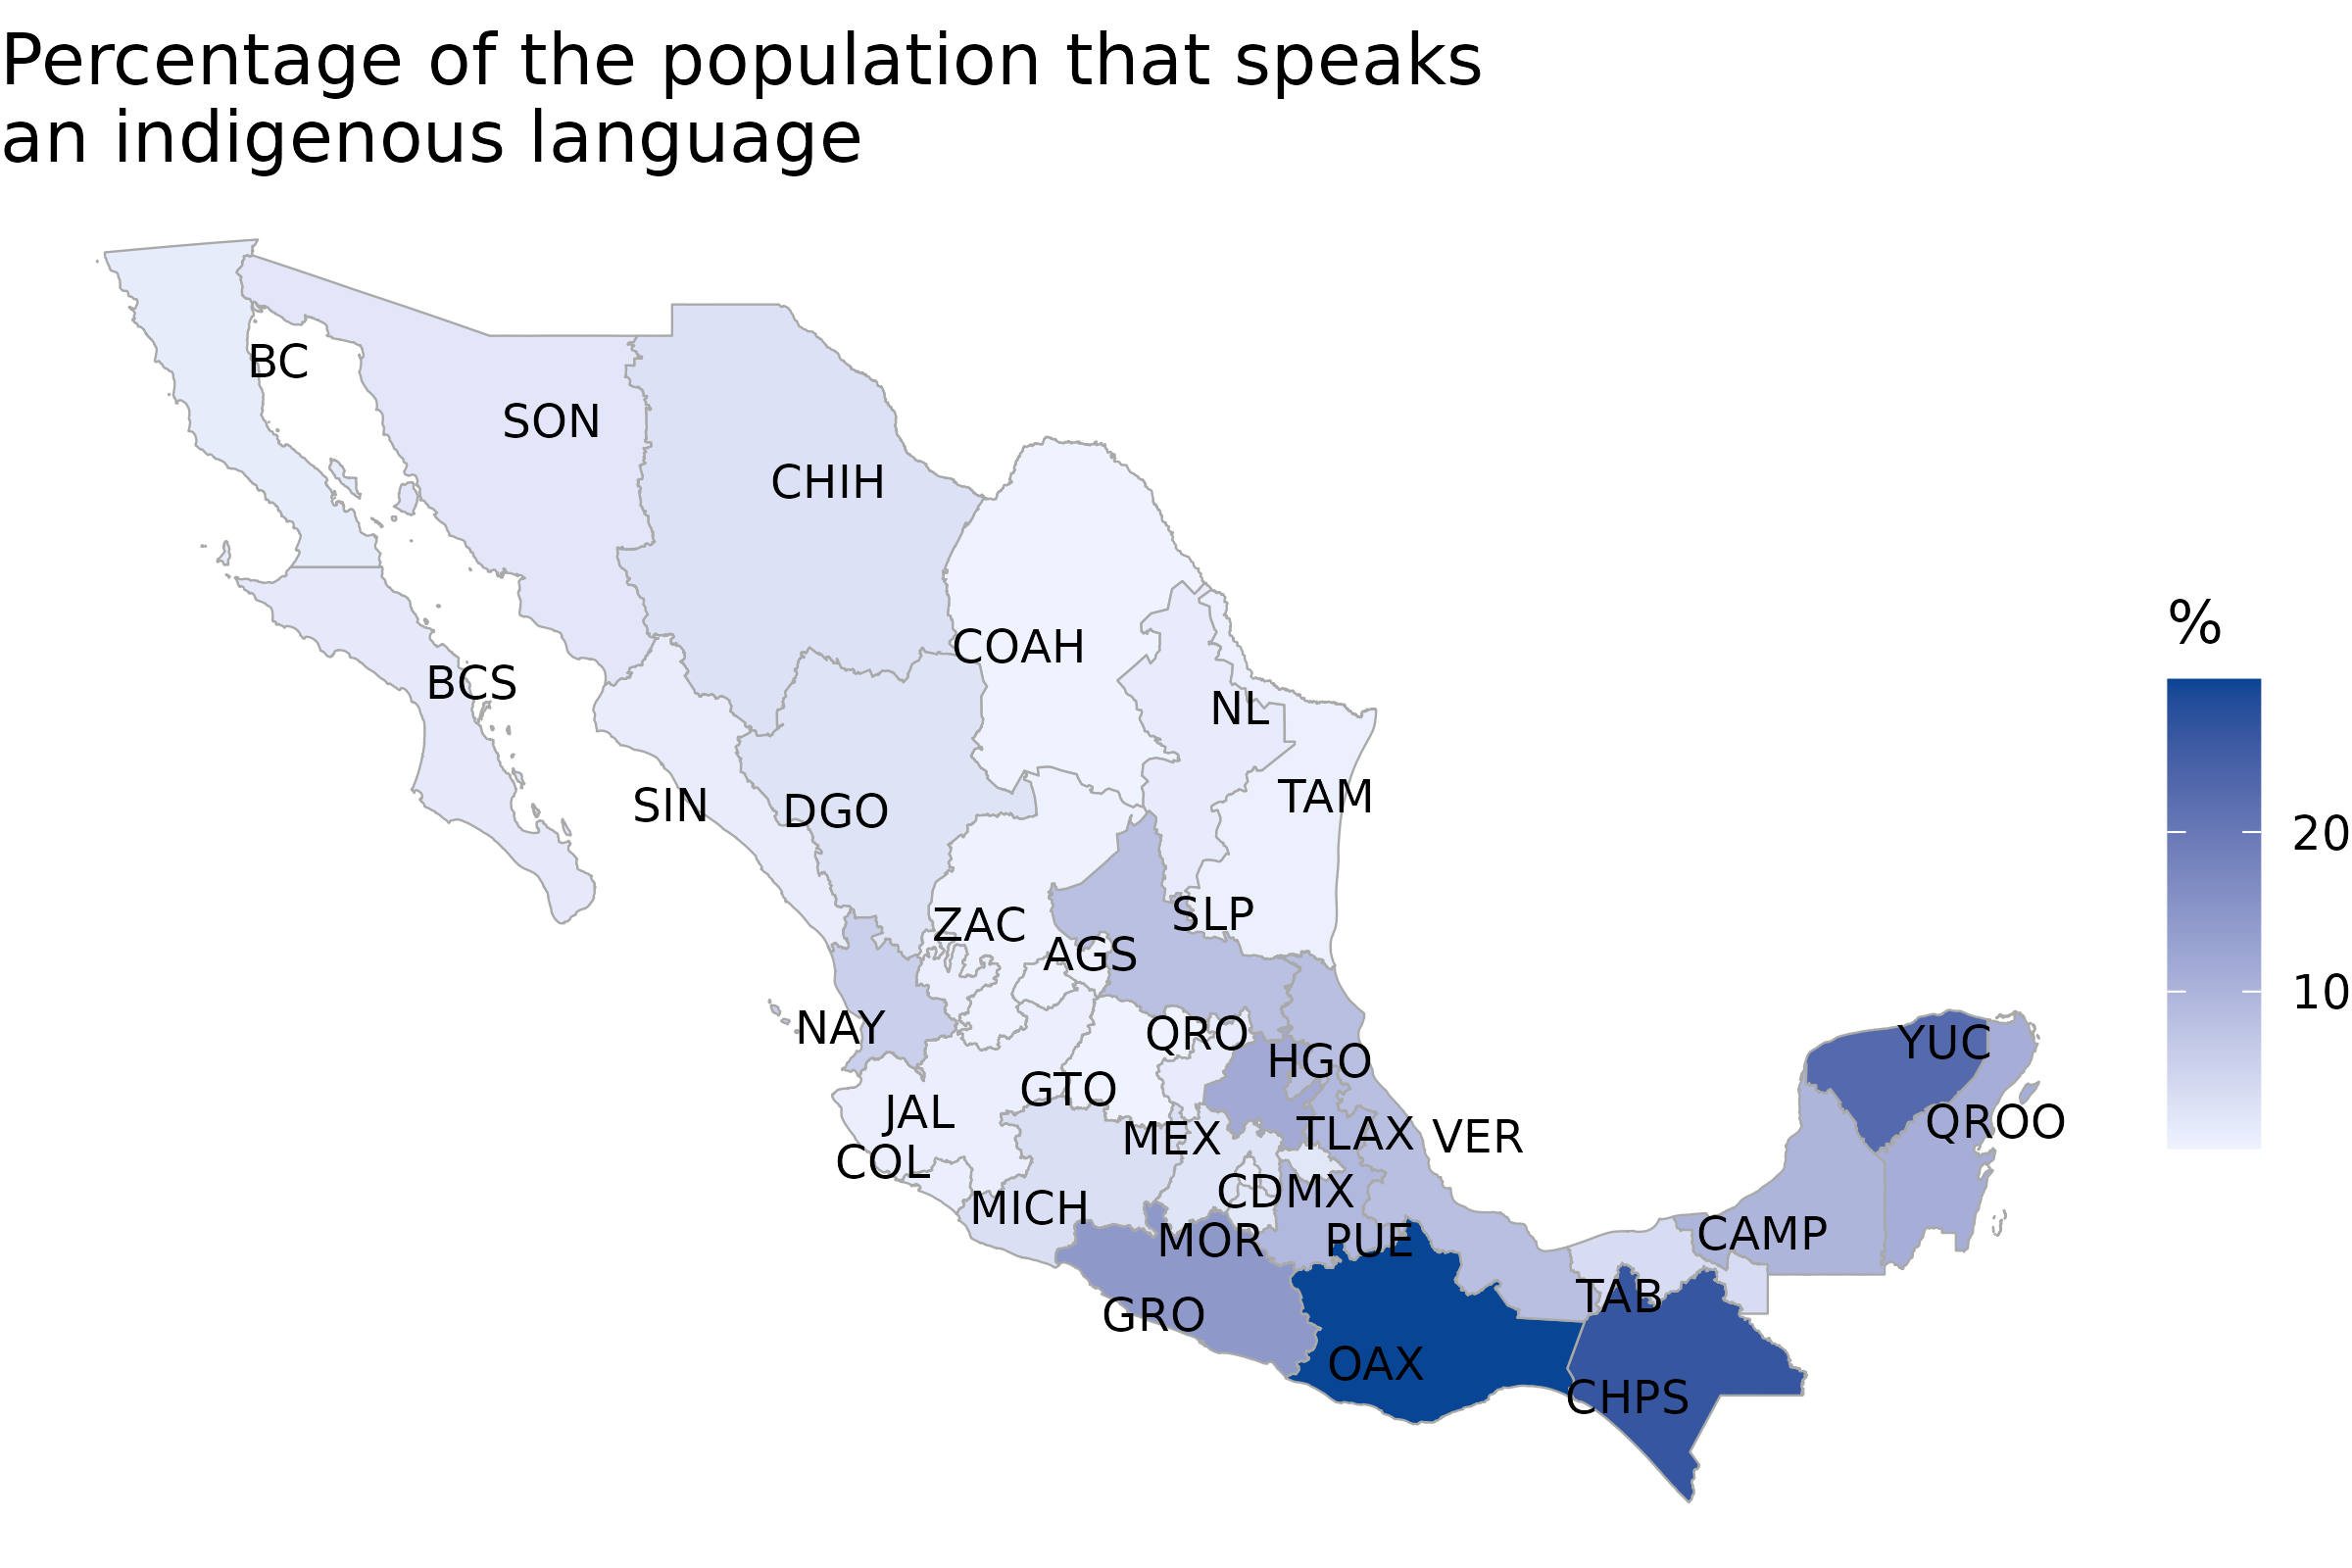
Adding Labels to the Map
This example shows how to add labels to each state on the map. The
ggrepel package is used to prevent the labels from
overlapping.
library("geojsonio")
library("ggplot2")
library("ggrepel")
library("sf")
library("RJSONIO")
library("dplyr")

df_mxstate_2020$value <- df_mxstate_2020$indigenous_language /
  df_mxstate_2020$pop * 100
p <- mxstate_choropleth(df_mxstate_2020,
  num_colors = 1,
  title = "Percentage of the population that speaks\nan indigenous language",
  legend = "%"
)


data("mxstate.topoJSON")

tmpdir <- tempdir()
# have to use RJSONIO or else the topojson isn't valid
write(RJSONIO::toJSON(mxstate.topoJSON), file.path(tmpdir, "state.topojson"))
states <- topojson_read(file.path(tmpdir, "state.topojson")) |>
  arrange(id)
df_mxstate <- arrange(df_mxstate_2020, region)

# make sure the coordinates of the labels are in the correct order

df_mxstate_2020$lon <- st_coordinates(st_centroid(states))[, 1]
df_mxstate_2020$lat <- st_coordinates(st_centroid(states))[, 2]


df_mxstate_2020$group <- df_mxstate_2020$state_abbr

p +
  geom_text_repel(
    data = df_mxstate_2020,
    aes(lon, lat, label = state_abbr),
    size = 3,
    box.padding = unit(0.1, "lines"),
    force = 0.1
  )
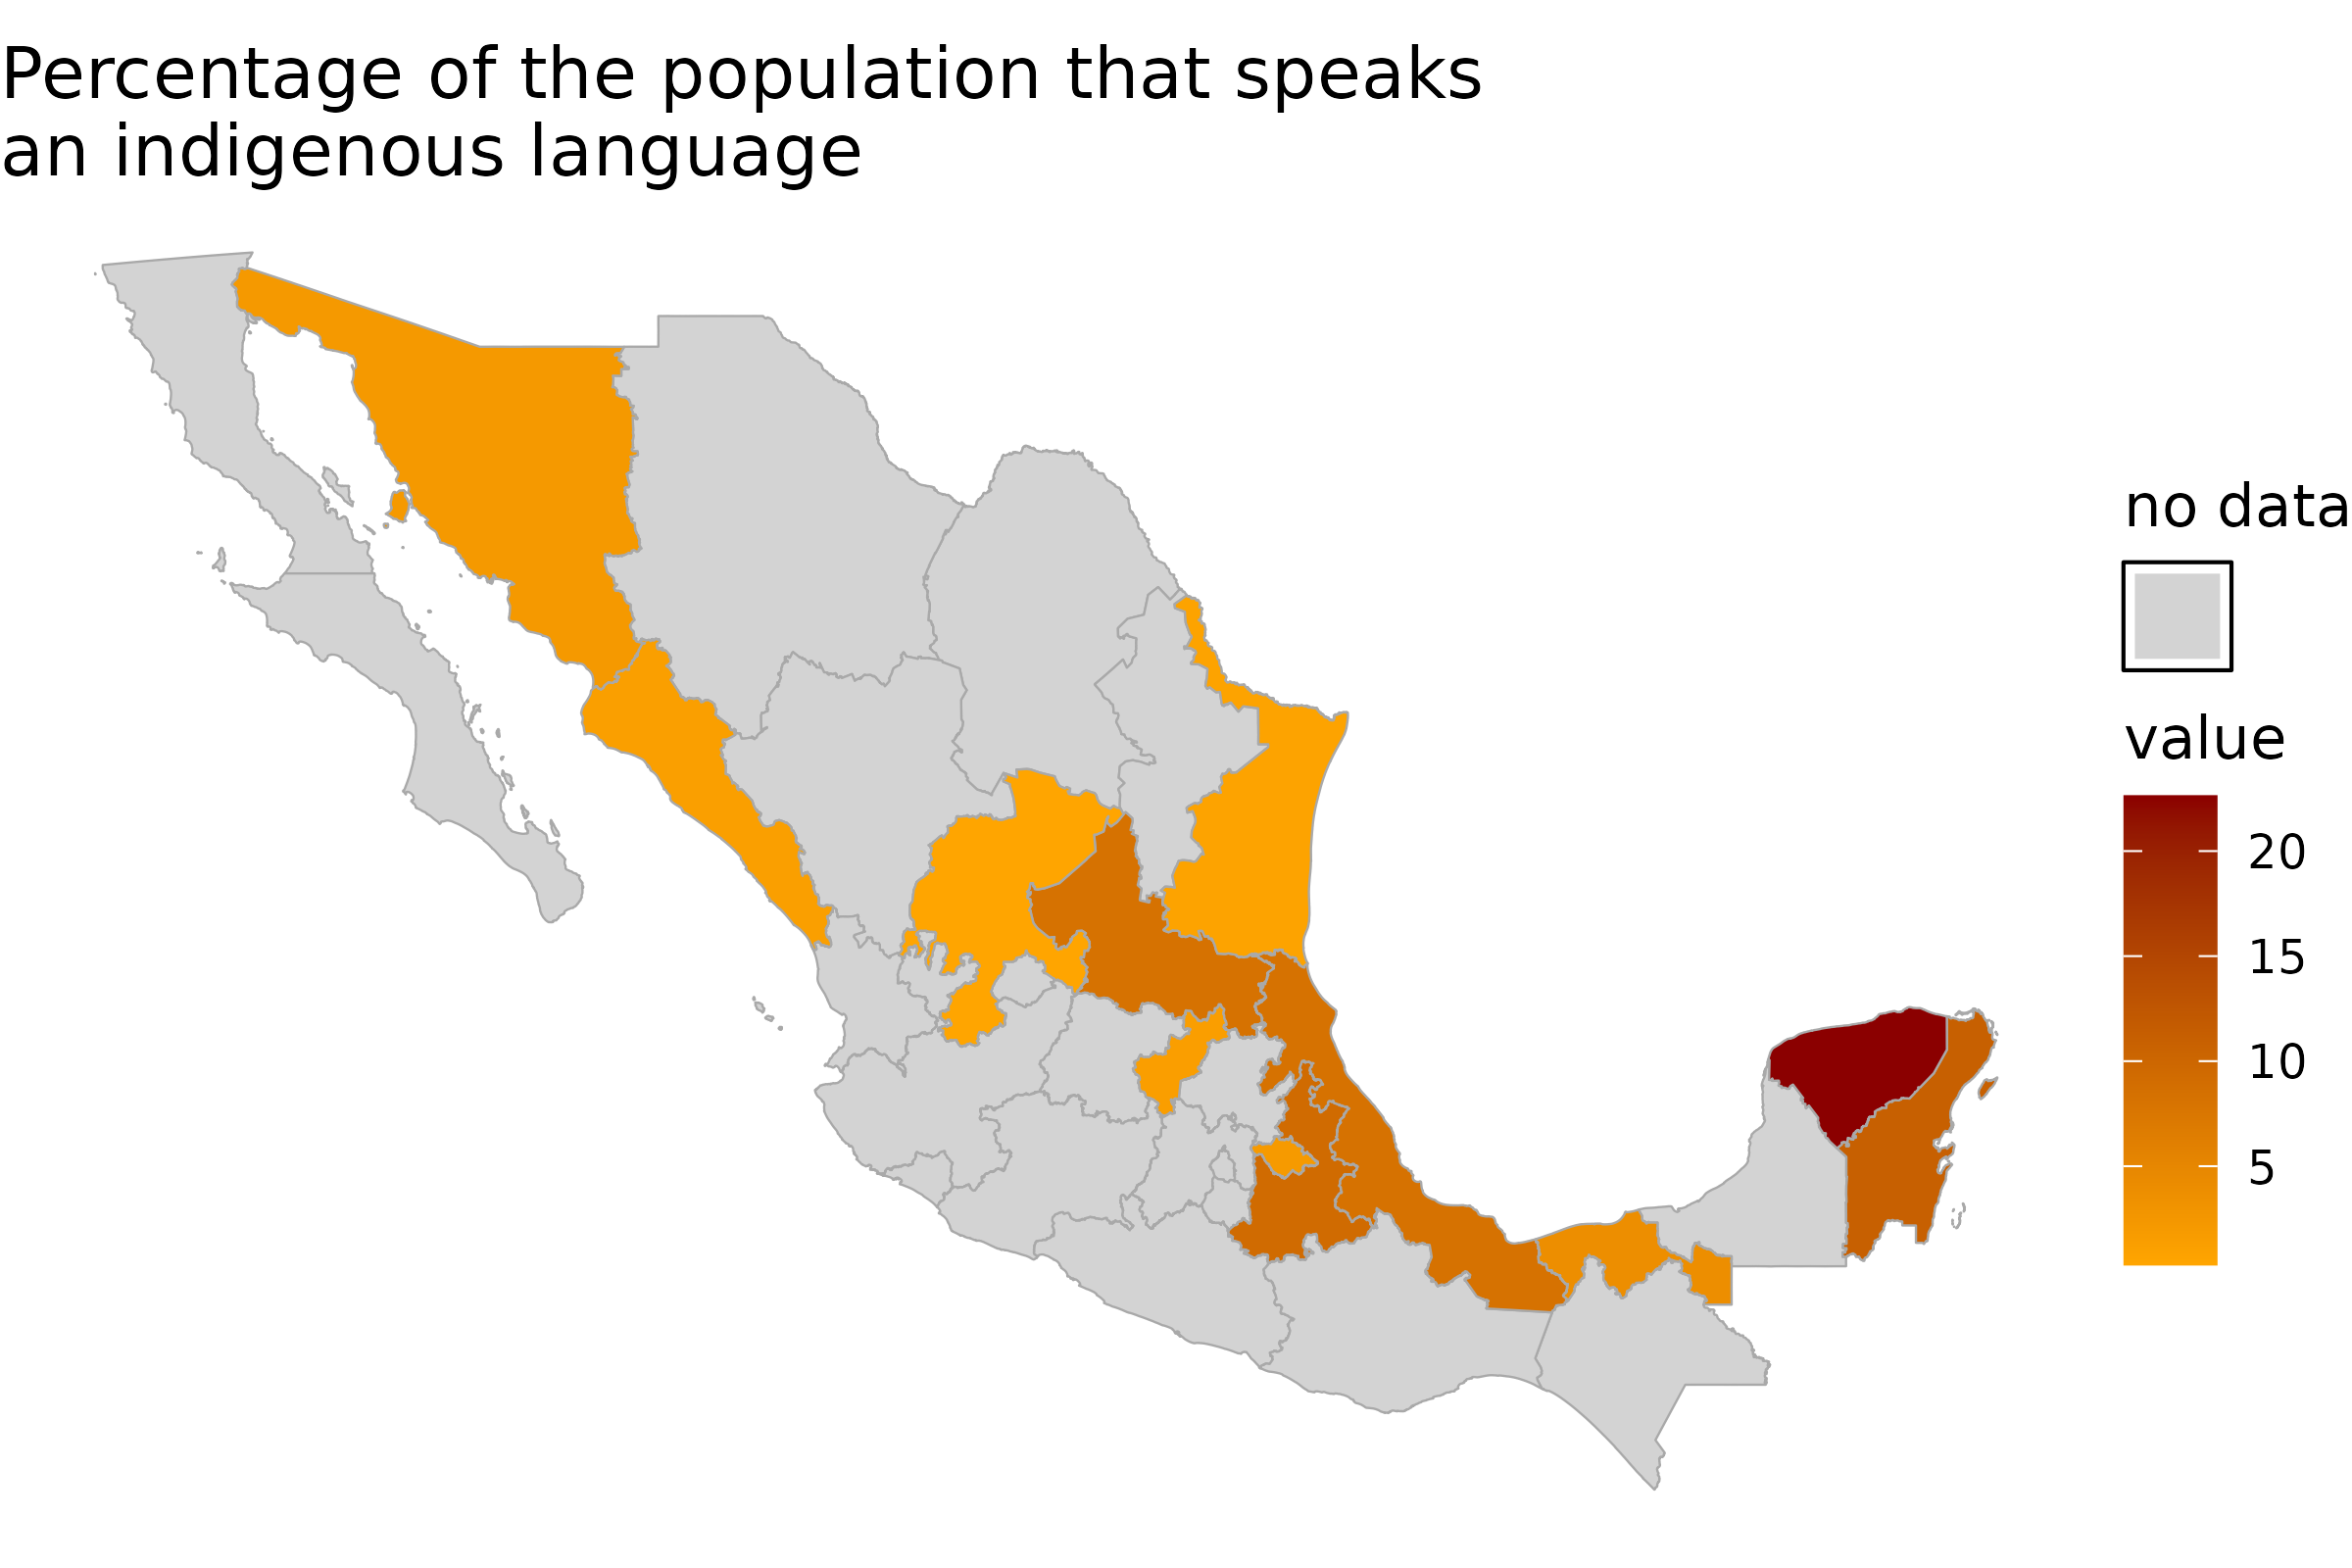
Legend for Missing Values
This example demonstrates how to add a legend for states with missing (NA) values. A separate legend is created to indicate which states have no data.
df_na <- df_mxstate_2020
df_na$value[1:20] <- NA
mxstate_choropleth(df_na,
  num_colors = 1,
  title = "Percentage of the population that speaks\nan indigenous language",
  legend = "%"
) +
  # Add a fake color scale which we'll change to 'no data'
  geom_point(
    data = df_mxmunicipio_2020[1, ],
    size = -1,
    aes(
      color = "",
      group = NA
    )
  ) +
  scale_color_manual(values = NA) +
  scale_fill_continuous(
    low = "orange", high = "darkred",
    na.value = "lightgray"
  ) +
  theme(legend.key = element_rect(color = "black")) + # Add a border to the legend
  # Add an extra color legend with a giant square
  guides(color = guide_legend("no data",
    override.aes = list(
      color = "lightgray",
      shape = 15, # shape 15 is a black square
      size = 7
    )
  ))
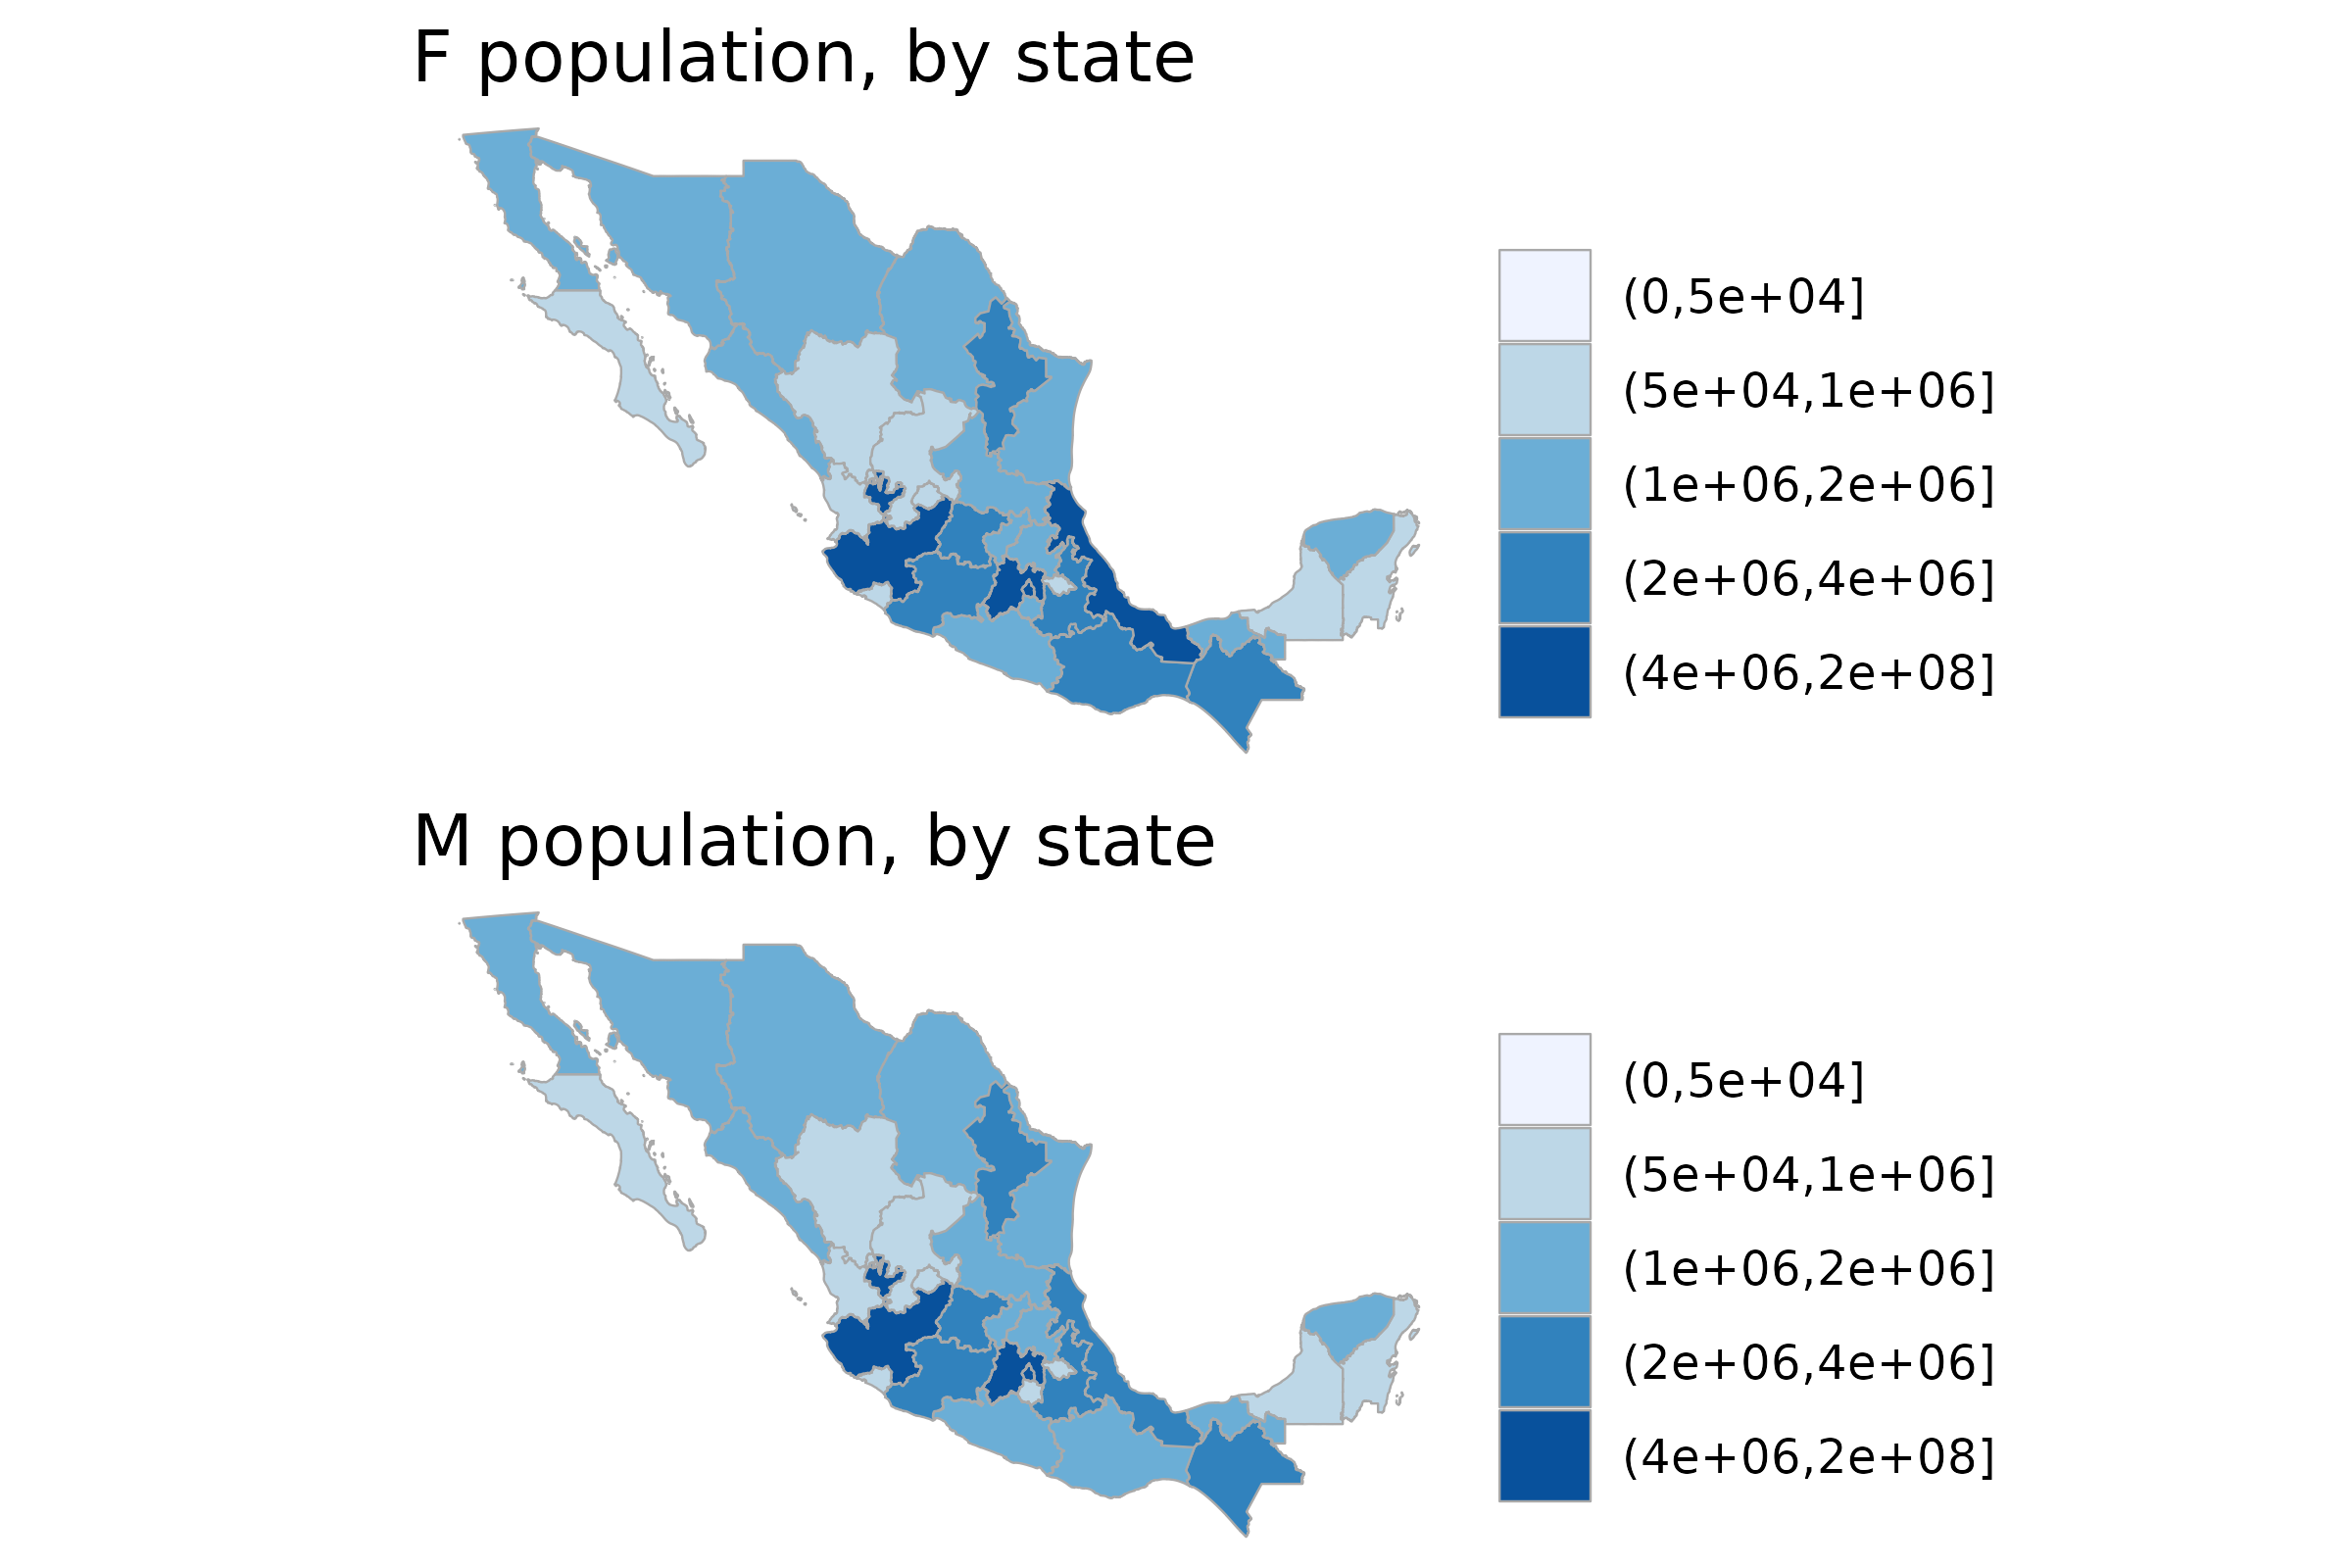
Creating Small Multiples (Faceting)
While mxmaps is not directly compatible with
facet_grid, this example shows how to mimic faceting
functionality by creating multiple maps and arranging them in a grid
using the ggarrange function from the ggpubr
package. This allows for the comparison of different variables or
populations side-by-side.
library(mxmaps)
library(ggplot2)
library(ggpubr)

data("df_mxstate_2020")
df <- rbind(df_mxstate_2020, df_mxstate_2020)

df$genero <- rep(c("m", "f"), each = 32)
df$value <- ifelse(df$genero == "m", df$pop_male, df$pop_female)
# This is needed so that both the male and female population scales have
# the same values
df$value <- cut(df$value, breaks = c(0, 5e4, 1e6, 2e6, 4e6, 20e7))


f <- mxstate_choropleth(subset(df, genero == "f"),
  title = "F population, by state",
  num_colors = 5
)
m <- mxstate_choropleth(subset(df, genero == "m"),
  title = "M population, by state",
  num_colors = 5
)

ggarrange(f, m,
  labels = c("", ""),
  ncol = 1, nrow = 2
)
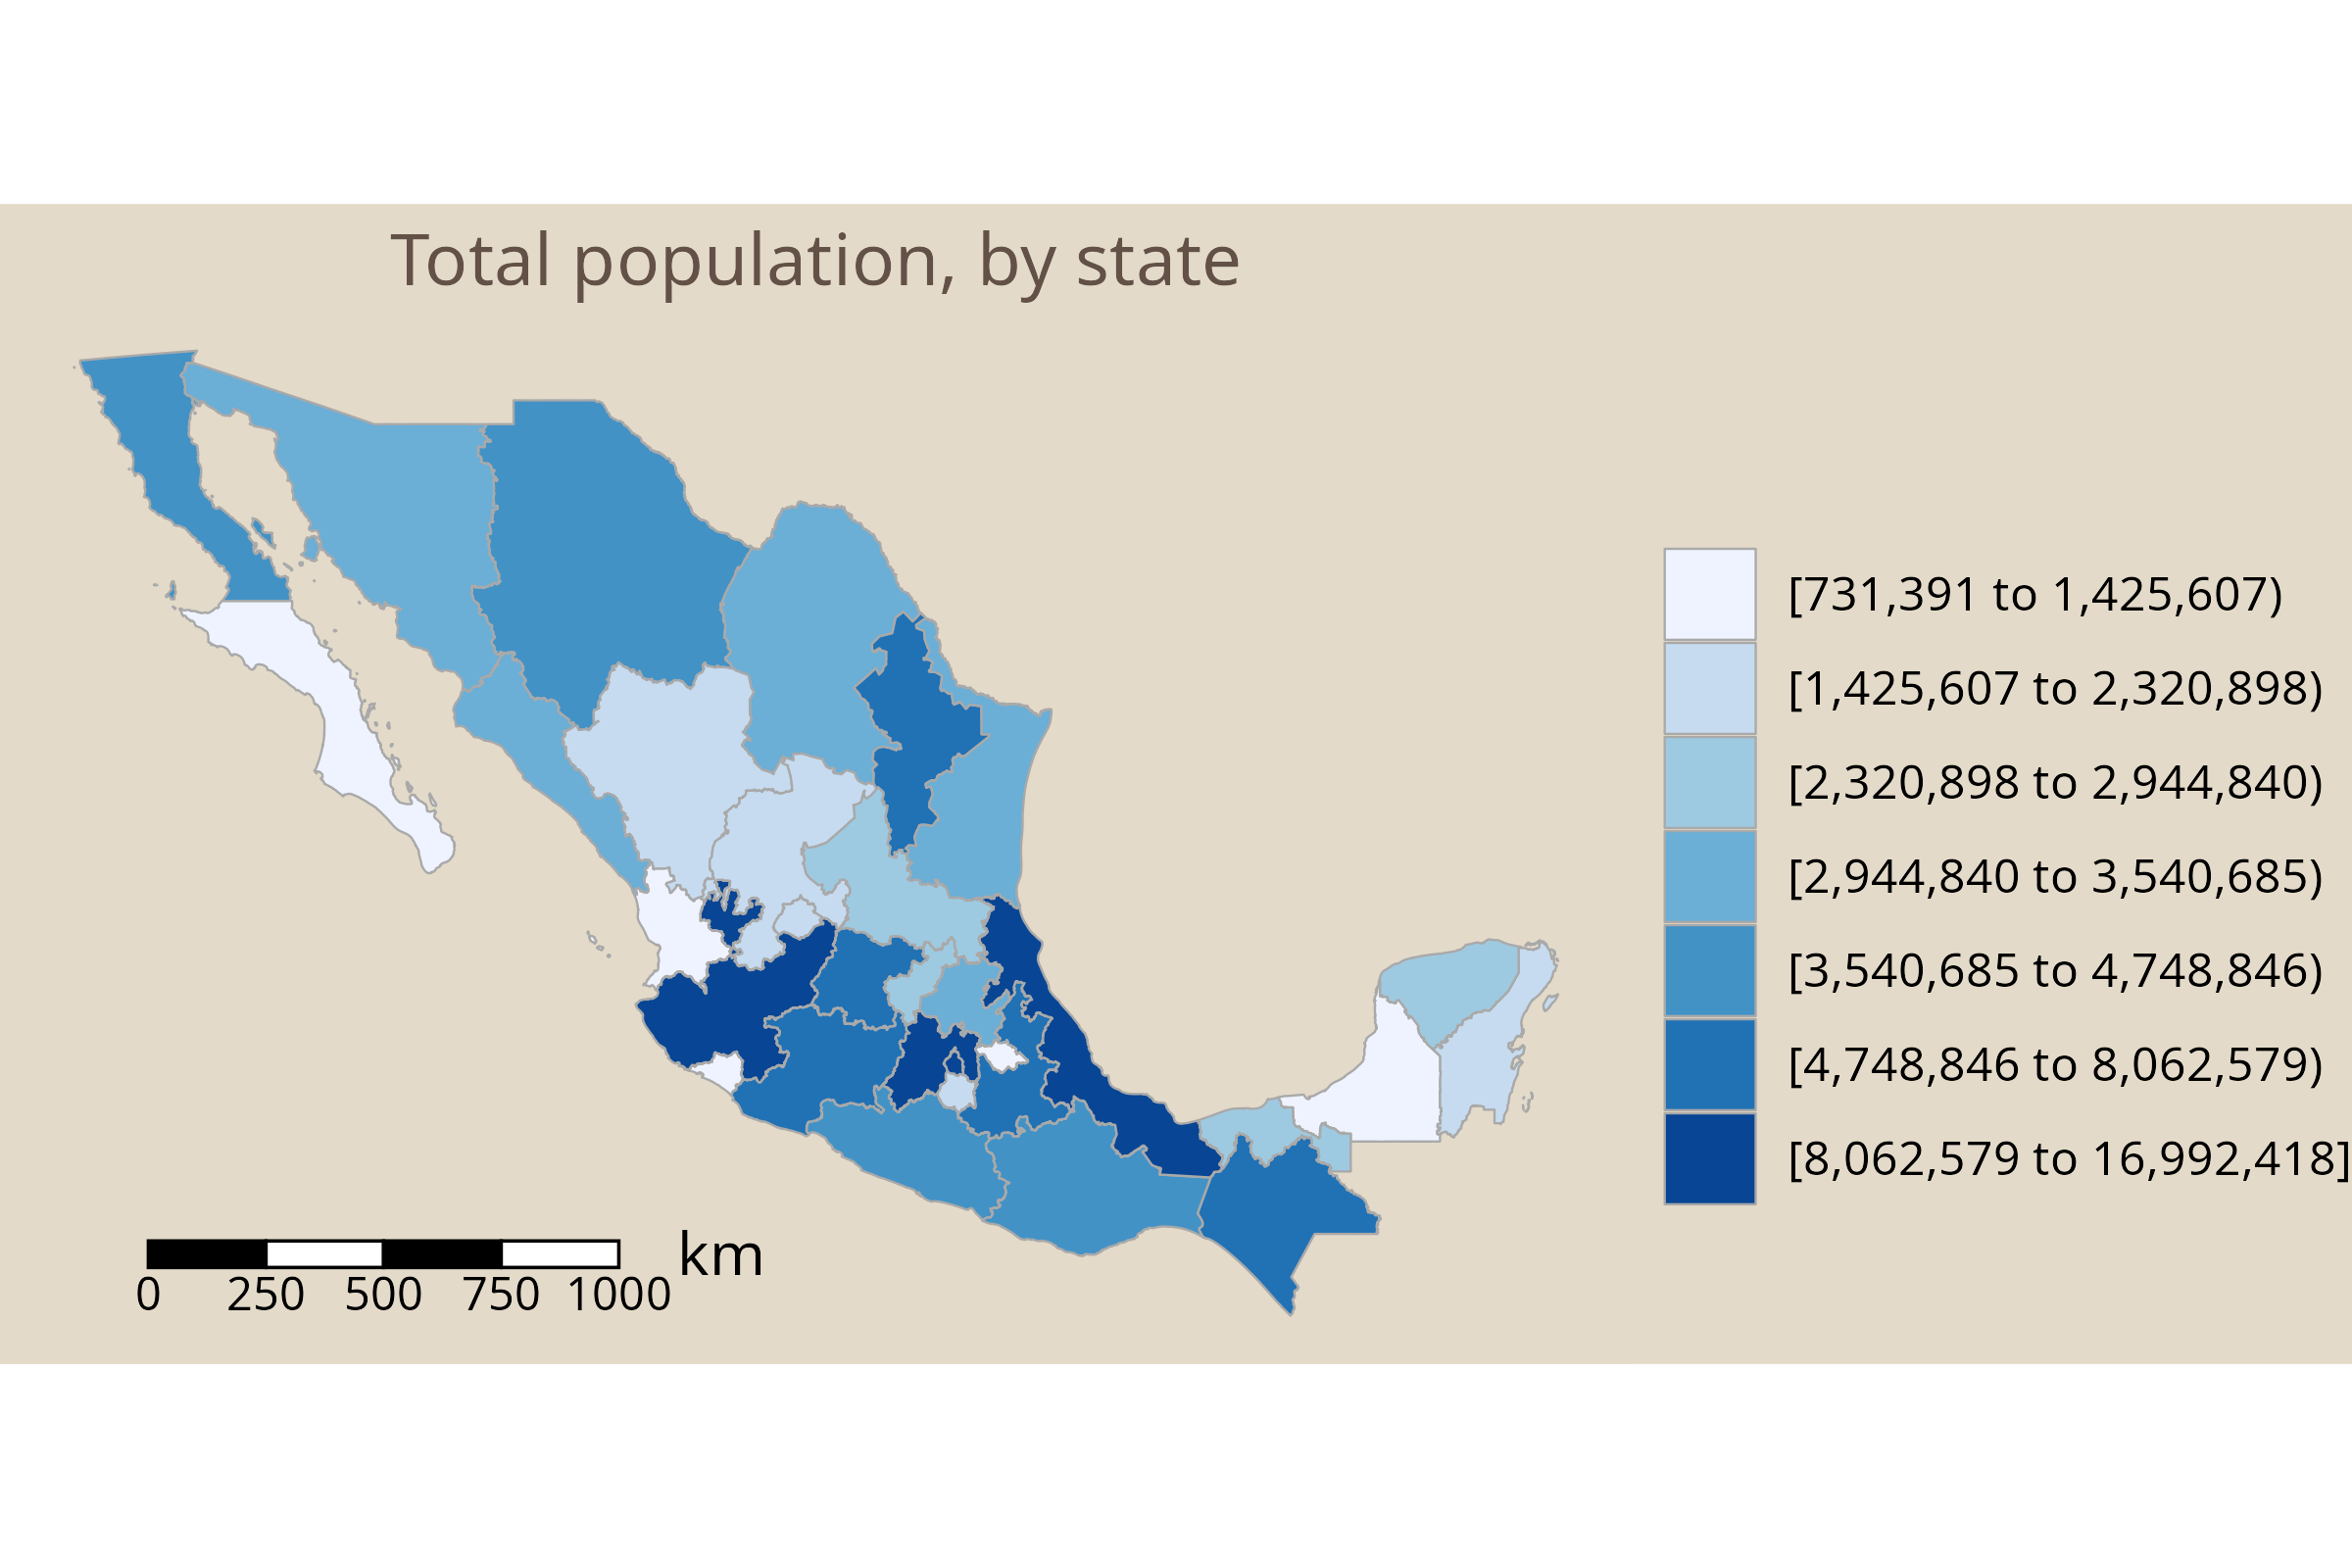
Scale Bar
mxmaps can automatically add a scale bar to your map, making it
easier to interpret distances at a glance. The scale bar can be
customized through several parameters: scale_bar_position
controls where it is placed on the map (for example, "bl"
for bottom-left), scale_bar_length sets the total length
represented by the scale bar in kilometers,
scale_bar_segments defines how many divisions the bar is
split into, scale_bar_height adjusts its visual height,
while scale_bar_color and scale_bar_text_color
control the colors of the bar itself and its labels. For example,
scale_bar_position = "bl", scale_bar_length = 1000,
scale_bar_segments = 4,
scale_bar_height = 0.5,
scale_bar_color = "black",
scale_bar_text_color = "black" will place a 1000 km scale
bar with four segments in the bottom-left corner of the map using black
styling.
df_mxstate_2020$value <- df_mxstate_2020$pop
mxstate_choropleth(df_mxstate_2020,
  title = "Total population, by state",
  background_color = "#e3dac9",
  title_color = "#635147",
  title_position = "panel",
  scale_bar = TRUE,
  scale_bar_position = "bl",
  scale_bar_length = 1000,
  scale_bar_segments = 4
)